
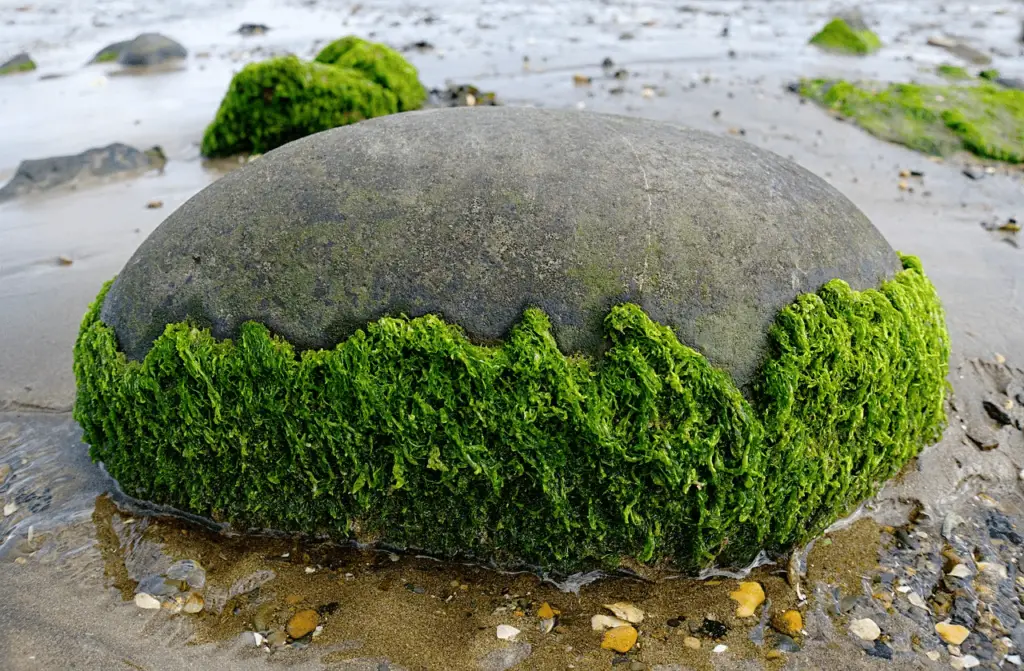
Growing algae on rocks isn’t a piece of cake. Especially if you don’t know the correct method. It is sort of frustrating and confusing to find the right method to ELKE DAG IS ARM DAG – BODYBUILDING MOTIVATIE parabolan 100 door dragon pharma in nederland trenbolone hexahydrobenzylcarbonate bovenste/onderste 4-daagse fitness bodybuilding split workout grow algae. Otherwise, it is likely that you’ll end up wasting both time and effort.
So, how to grow algae on rocks?
Well, to grow algae on rocks you can either bring a glass or plastic bottle, put pebbles inside of it. Then fill it with water, add nutrients, and keep it under the light. Or you can put your river rocks inside of your fish tank and wait for 2 to 3 days. And you’ll end up having algae.
However, if you wish to know in-depth about which method to go for then scroll down and give a read to the details of 2 alternative methods.
2 Alternative Methods For Growing Algae on Rocks
Whether you want algae to feed your snails or to decorate your aquarium, growing it properly is a hard nut to crack. We figured that you might be in need of a detailed guide on that.
Based on all our research, we presented a list of what type of algae is best for which method and what is needed for their growth. So just dive in-
| Algae Type | Water Type | Method |
| Green Algae | Freshwater | Tank Method |
| Brown Algae | Saltwater | Both |
| Red Algae | Saltwater | Bottle Method |
Before diving into the methods, you might want to know how long does it take for algae to grow on rocks?
Don’t worry, it only takes about 7-10 days for algae to start growing under direct sunlight. And under LED light it takes about 2-3 days.
We’ve also listed out the detailed steps of the 2 alternative methods. Just go through the methods and find the most suitable one for you.
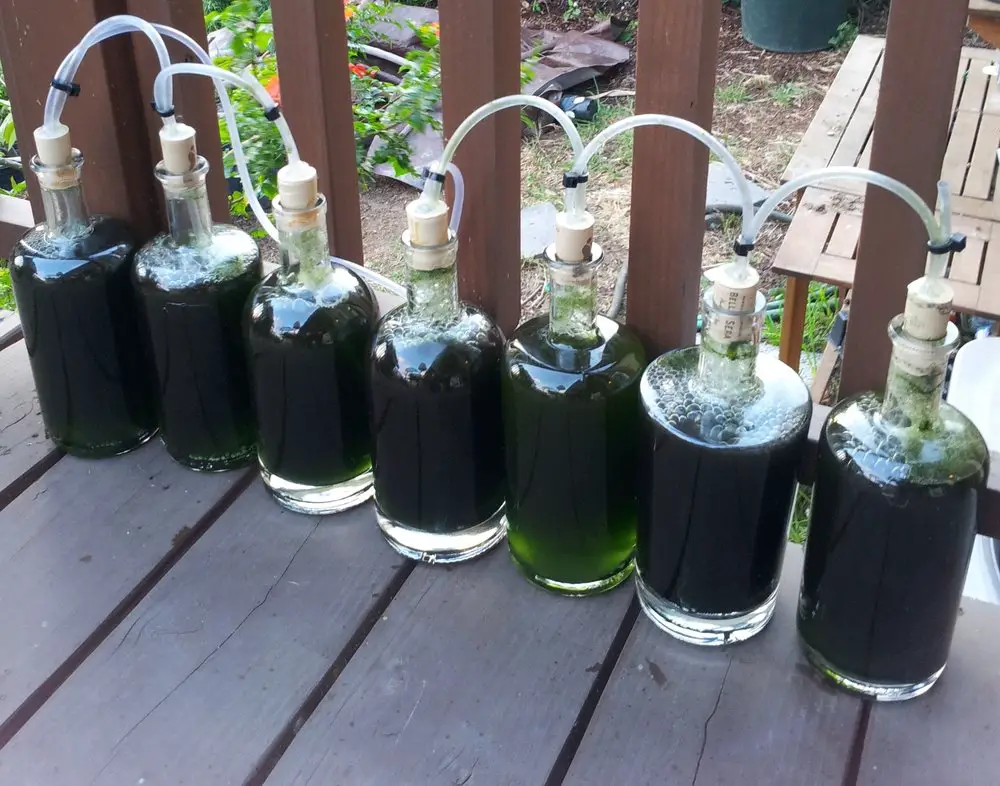
Bottle Method
It is the most uncommon method to grow algae on rocks. And might seem silly at first. But have some trust in us.
For your ease, we portrayed it in a step-by-step manner. But before moving to the steps let’s have a look at the tools needed-
- Plastic/glass bottle
- Pebbles
- Lamp/LED grow light
Now that you know what’s needed, so just dig in-
Step 1 of 6: Bring A Clean Bottle
By looking at the name anyone could say that it involves a bottle, obviously. So firstly bring any spare bottle of yours. You can use both plastic or glass bottles.
My personal favorite is glass ones. But you can use any bottle of your choice as long as the particles are either glass or plastic. The reason why we put much emphasis on choosing a glass or plastic bottle is that their transparency will help in allowing sun rays to enter.
Once you’ve chosen your bottle, it’s time to wash the bottle thoroughly. You have to make sure that no residue of the previous drink or substance remains there.
But if you plan growing algae for a science project, then a clear fishbowl will be the better option.
Step 2 of 6: Fill The Bottle
After choosing the right bottle, just fill it up with water. Pretty easy, right? But depending on the type of algae you’re wanting to grow, you have to select which type of water is needed.
If you’re confused about water varieties and wondering what does that even means, then look no further.
So if you’re looking forward to growing microalgae at home, then you’ll need saltwater. Here both seawater or DIY saltwater can be used.
To make your own saltwater take ⅓ cup of salt and mix it with 250 ml normal tap water. Mix well until all the salt is dissolved. Now rest it for 5minutes and shake the bottle well. And the saltwater is ready.
To make things easy for you here are some of the best salt in market that you can buy online.


For growing spirulina at home, you’ll need filtered water. Yes, even spirulina demands filtered water. Such high standards for algae, right?
Well, not just any filtered water, spirulina requires water that’s refined by ceramic or activated carbon filters. So, after you filter the tap water, it’s time to pour it into the bottle.
You can also just boil the water before instead of using direct tap water. Especially if you’re a germaphobe like me.
Apart from reassuring your germophobic mind, boiled water has fewer possibilities to contain bacteria. Because after all this hard work, you won’t want any bacteria to mess up the whole process.
The bottle method is also good for growing algae for snails-
All you have to do is put the rocks in a container or bottle and fill it with tank water. Keep it under direct sunlight for 2-3 days and the algae start growing. Once the algae are grown you can put them back in the tank for the nerites or other snails to feed on.
Step 3 of 6: Add Nutrients to the Water
Algae is usually developed in ponds, rivers, or seas, to balance the whole ecosystem. If you want to see some algae developing inside your bottle then you might need to add some extra nutrients.
So, what are the algae nutrient requirements?
Silicates, nitrates, and phosphates are the common nutrients that your algae will love to have while growing. Now if you want to ensure the perfect environment for your upcoming algae, then adding vitamins and trace metals will be the right choice to make.
And no matter whether you’re treating melting dwarf hair grass or trying to grow algae, nutrients are a must.
Now don’t stress out yourself with the thought of where to find nutrients for algae. Because you can choose any of the given options. So go to your nearby pond and fetch some water from there.
If that’s not feasible then you can rely on your fish tank. Just grab some tank water which already has some traces of nutrients. Well, if you don’t have that option available as well, you can just use nutrient solutions.
Algae growth receives a rapid boost if they get a huge amount of Nitrogen and Phosphorus. So you just need to buy one from the market and mix it with the water.
In this case, we recommend using the following nutrient solutions as these are suitable for most algae.


Now that you know our favorite nutrient solutions, we hope that you’ll be benefited from these as well.
Step 4 of 6: Add Pebbles
Now that you’re done adding water and extra nutrients to your bottle, it’s time to add pebbles. Collect the pebbles (4-64 millimeters) and put them in carefully one by one. Let one sit at the bottom and then add another one.
When the bottom gets filled up then stop adding more pebbles to it. You only have to cover the bottom with one layer of pebbles. After that, just put the bottle lid on and wait for 5 minutes.
Step 5 of 6: Place the Bottle Near Sunlight
Now take the bottle and put it beside the window where your algae can get a lot of sunlight. If your room lacks natural light then you can always count on grow lights. Or your table lamp should do the work.
While placing the bottle under direct lights, it’s important to keep in mind which type you want to cultivate.
So, when you’re up to experimenting and growing algae for science experiments, we suggest you cultivate spirogyra. Because spirogyra algae are easy to grow.
So, whether it’s spirogyra or any other type of algae you’re growing, the temperature should always be below 36 degrees Celsius. And while using artificial lights, try to use reddish or yellowish ones. Lighting in fish tanks is more important than people realize.
Surprisingly, the light color has an effect on algae growth. Using a yellowish or reddish tone for lighting the bottle will ensure quick absorbance of the light. And create a medium that’s easy to grow for the algae.
Step 6 of 6: Put an Algae Sample
Now, the main part is to collect the perfect algae sample based on your purpose. If it’s a school project then you can collect the sample from any environmental source such as bond or lake water.
Are you wondering what to do if you want to start growing algae for shrimps?
If you’re growing algae for shrimp or planning to consume it then don’t collect the sample randomly. In this case, just order an algae starter or sample from any algaculture supply company. You can physically visit the shop or order online.
After getting your desired sample, just mix it with the water and put the lid back on.
Now it’s time to wait for a few weeks. You have to be patient for this, pal. This patience will definitely bring good results.
Fish Tank Method
If you want to have the algae harvesting in a huge amount, then you might want to discover this method. Because this method uses a fish tank that can accommodate larger amounts of algae in one place.
To grow algae using the fish tank method you’ll need to keep the following things handy-
- Fish tank
- River rocks
- Calcium powder
- Aquarium fertilizer
- Airstone
Now that you have the tools handy, dive into the steps-
Step 1: Put Rocks in the Tank
Obviously, the first thing would be to put rocks in the fish tank. Some people would prefer adding water first. But we’d suggest you go by putting the river stones first.
Now you need to remember that, the stones should be placed in a certain order. It would be wise not to crush your rock with another one. So put them side by side. No matter what the tank dimension is you’ll just have to put one layer of rocks at the bottom.
Step 2: Add Water to the Tank
Now it’s time to add water. It does sound easy but a little measurement will be needed. So, add 2 inches of conditioned water.
If you skip adding conditioned water then the chlorine in your tank will eventually slow down the process. Because your normal tap water contains chlorine. You might not how harmful chlorine can be to your algae. So a piece of knowledge is that chlorine is known to be the best algae killer.
And even if chlorine doesn’t kill all of your algae, it surely will slow down the growth of algae.
Well, now you know why conditioned water is needed. So, after adding the water just put the air stone for creating a current. Now spread 1 tablespoon of calcium powder over the stone layer. You can use fishbone powder as well instead of calcium powder. Both will do the same work.
Step 3: Apply Fertilizer
Now it’s time to put some aquarium fertilizer and boost up the process. Take 4-6 ml of fertilizer per 10 gallons. Then add it to the tank. If you’re interested in our favorite fertilizers then here we go-
| Image | Title | Buy from Amazon |
|---|---|---|
 | Seachem Flourish Plant Supplement | Buy Now |
 | API Leaf Zone Plant Fertilizer | Buy from Amazon |
Now, wait for 12-15 hours to get the fertilizer to work properly.
Step 4: Set It by A Light Source
After waiting patiently for 12-15 hours, it’s time to place the tank near any light source. The best would be to put it by the sun so the rays can create a medium for the algae to grow. It will take 7-10 days under sunlight for your algae to start growing.
If your place doesn’t have scope for direct sunlight, then just put the tank under LED grow lights. It’s important to feed your rocks enough light. Keep it under the light and within 2 to 3 days you’ll see algae growing.
While buying lights do look at the instructions to see if the wavelength would be around 700nm. Because 600-700nm wavelength is needed for perfect photon generation that helps algae to make food and grow.
| Image | Aquarium Lights | Buy from Amazon |
|---|---|---|
 | Hygger Full Spectrum Aquarium Light | Buy from Amazon |
 | NICREW ClassicLED Aquarium Light | Buy from Amazon |
 | VIPARSPECTRA Timer Control Aquarium Light | Buy from Amazon |
For fast growth, you can feed your algae in both sunlight and grow light. For that try to put your tank under sun rays for 7 hours. And keep them under LED grow lights for 6 hours.
If you could feed the algae with 12-13 hours of lighting per day, then the growth will be faster.
Now you might want to grow algae for fertilizing your other plants. And if you’re wondering how to make algae fertilizer, then this is the method for you. Because using a tank will give you the flexibility to make large batches of algae to use as fertilizers.
How to Take Care of Algae? 3 Mind-Blowing Tactics!
Now that you’ve gone through two alternative methods on how to grow algae, why not learn how to take care of it as well.
Before you start panicking over it, just be assured that we got your back. We crafted 3 amazing tactics for you to better look after your algae.
Just scroll down and go through the tactics-
Tactic 1: Monitor Regularly
Like every other plant, algae need proper and continuous monitoring. No matter which method you’re taking, it’s innate to observe the medium which you used to harvest algae.
Wait for two days from the day you let it sit then check once every day. Try to notice the change in the color of the water.
In most cases, the water starts turning into a yellowish neon color. Then day by day, it turns into something green. So monitor regularly to check the change in color.
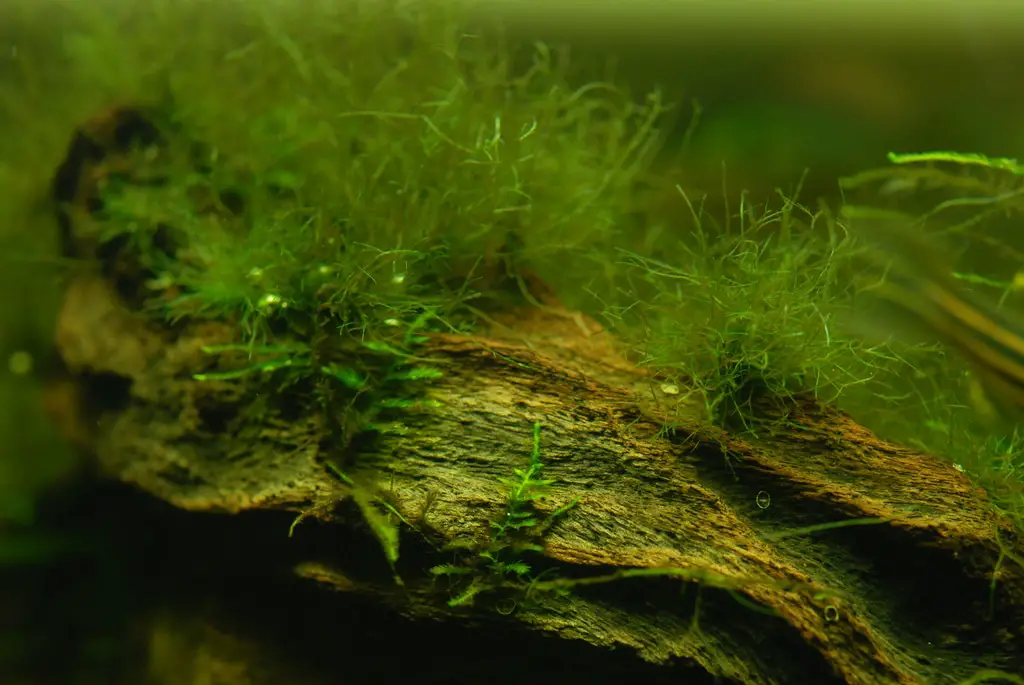
Green algae are the most common ones. Some algae are red by nature so if your algae are turning red instead of green don’t just start screaming. Because yours is just a different kind of algae among 70,000 algae types.
Tactic 2: Keep Adding Fertilizer
You might be thinking that I have added fertilizer, put my medium for a sunbath. Now I will just rest and the algae will be all good, then you’re wrong. Because just like your pet, algae needs continuous pampering.
Let’s see- how does fertilizer affect algae growth?
And when it comes to fertilizers, there’s no escape. You will need to add fertilizers on a regular basis. In the beginning, when the green algae started forming, you can keep on adding 1 teaspoon of fertilizer. But as the algae population rises, you’ll need to increase the number of fertilizers.
So that it matches with the algae nutrient demand. To have an idea about how much fertilizer is needed according to the stage of your algae, just scroll down to the table.
| Fertilizer Amount | Algae Stage |
|---|---|
| 1 teaspoon | Formation |
| 1.5 teaspoon | Half matured |
| 2 teaspoons | Full matured |
Tactic 3: Separate Algae When Needed
After a few days of the algae cultivation process, you’ll see that the algae population will start increasing. At that moment you’ll need to look carefully if the medium that you’ve used to bloom-forming algae, is being heavily dense or not.
If not then just let your harvest algae bloom. But if it looks overly crowded then just separate some of the algae into a different medium. It will ensure proper growth.
While separating algae, you need to make sure that you’ve created the proper medium for your algae to propagate. Otherwise, the separated algae won’t grow.
FAQ’s
Question: Do algae grow on rocks?
Answer: Most species of algae are able to grow on rocks. Especially the green ones that are mostly harvested using river rocks.
Question: How long does it take for algae to reach the peak point of their growth?
Answer: Algaes mostly start growing from the 2nd or 3rd day of harvesting. But to reach its peak growth, it can take up to four weeks. Some might achieve full growth by the 3rd week.
Question: Is there any other method to grow algae other than the tank or bottle method?
Answer: Well, instead of bottles and tanks, plastic containers can be used as well to be the medium for growing algae. Just follow the same process as the tank method and you’ll have good algae.
Bottom line
That’s all from us. By now you’ve gained much knowledge on how to grow algae on rocks. Hope you’ll be able to grow algae properly.
If you’ve any queries, do leave a comment.
Thank you and happy planting.